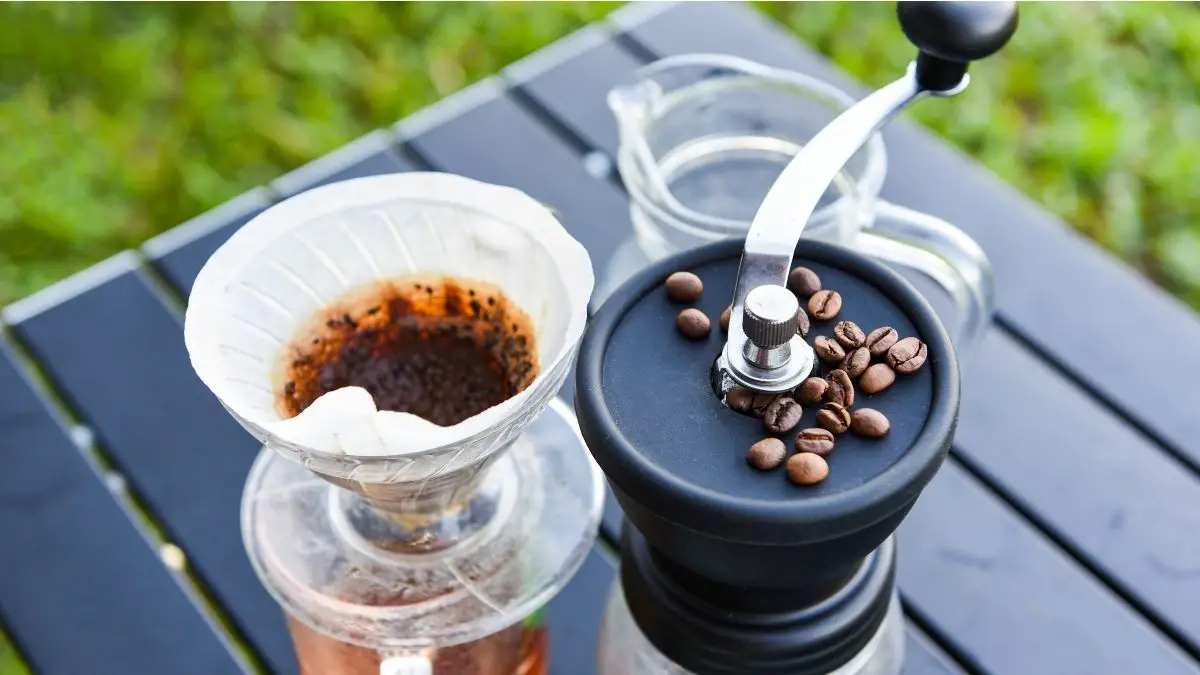
Pour-over coffee, as its name suggests, is made by putting a ground-filled filter over a mug or a Chemex coffee maker and gently pouring hot water from a kettle to saturate the coffee grounds and extract your aromatic and hopefully flavorful joe. It’s a very easy task, no need for electric machines at all, but what makes this seemingly simple process kind of difficult is how you should pour water into your cup.
Anyway, before we get into the secrets of perfectly brewing pour-over coffee, we have to first accentuate our question at hand.
The quick answer is, yes, you can use espresso beans or blends for pour-over, but you have to be prepared for what comes after that.
Espresso is typically brewed from an espresso machine that provides the beans with the necessary pressure and heat to extract their precious flavors and coffee oils through a portafilter and into your demitasse cup within 30 seconds. So, the espresso is so named for being the fastest coffee to brew, in a machine that is. There are also multiple reasons why an espresso has to be pulled under such conditions.
Still, other espresso varieties can be made with French press, moka pots, and aero press, but baristas do affirm that none else beats espresso perfectly pulled from a machine. That said, you will find yourself a few difficulties if trying to brew espresso beans via pour-over, and that’s fine because the process is pretty much just experimental.
Also, the pour-over method of brewing is fundamentally different from espresso-making, but the possibility of making smooth and rich coffee from this uncommon duo remains.
Espresso And Pour-Over: Key Differences
What Makes An Espresso Shot?
I don’t want to take too much time and words on this topic as we’ve already highlighted the making of espresso countless times from our previous articles. So, to make it short, an espresso shot is a highly-concentrated ounce of coffee and one that also possesses strong caffeine and flavors. From a glass cup, you will see an espresso as a tri-layered beverage with its foamy crema on top consisting of emulsified coffee oils, the body section with a balance of sweet, bitter, and nutty flavors, and the bottom heart which contains most of the sweetness and roast profile.
With only about 30 seconds worth of brewing and extraction times, an espresso is great to take as a quick and powerful wake-me-up shot. Espresso is usually served as a double shot or a two-ounce drink with the concentration of around 18 g of finely ground coffee and 120 mg of caffeine. Its complex flavor and thick body are mainly due to its high-pressured extraction through a portafilter with extremely tiny holes on a metal basket.
What Makes A Pour-Over Coffee?
A pour-over coffee on the other hand is vastly different in preparation, taste, and body compared to an espresso. While espresso has a coffee to water ratio of 1:2 grams, a pour-over usually has a 1:16 and this already makes a pretty potent brew.
What coffee aficionados and expert baristas would aim for using a Chemex coffeemaker is a silky smooth texture of coffee with a balance of sweetness and acidity. For this reason, light roast coffee is more commonly preferred in pour-over coffee. These lighter brown beans produce the intended brightness and smoothness of the coffee drink, making it a more enjoyable experience.
It takes longer to brew this coffee than espresso. You’d usually get your drink after 4 to 6 minutes with a couple of interval pours and stirs, but I assure you the wait and effort are worth it. Since a pour-over coffee is a manual process, understanding how to properly measure and brew your beans matters a lot, and even how fast or gentle you pour and stir.
As you may have known, a Chemex brewer usually calls for a thicker paper filter that is originally square-cut and folded twice in, so that you’d get a shape 1/4 of its original size. Then you slip your hand into a fold where you shape the paper as a cone and spread it apart, with one side having a thin layer of paper, and the other with a thicker three.
When you put a paper filter onto your Chemex or mug, straining the coffee grounds through this would take away its primary coffee oils such as cafestol and kahweol, reducing the bittersweet notes and aroma of the final blend.
A regular 8-ounce serving of pour-over coffee contains 175 mg of caffeine, slightly higher than that of a regular drip, and according to one tasty blog, this is mainly due to the higher water temperature used to pour into your cup, which extracts caffeine much faster than warmer temperatures.
Coffee Grounds
A standard expresso calls for a fine grind size of coffee beans and this is so they can be pressed tightly into the portafilter and ensure an even and uniform extraction. The beans commonly used for espresso may be medium or medium-dark roasts, or perhaps a blend of both. Some espresso varieties use light or dark roasts, but they’re not very widespread as of yet.
Darker roasts are preferred because these grounds usually have developed a significant amount of coffee oils which will introduce a thicker crema than lighter roasts, bolder roast profile and flavors with less acidity, thicker aromas, and stronger caffeine content in the final brew.
Because an espresso shot is pulled from finely ground, medium roast beans, there is greater surface exposure that would allow pressurized hot water to effectively pull out the deeper taste notes (hazelnut, caramel, and chocolate) of the espresso blend. Caffeine is also more easily extracted due to extremely hot water and surface area exposure. The oils would also safely pour into the cup as a foamy layer as the metal meshed portafilter wouldn’t hold them back.
Meanwhile, a pour-over coffee most commonly uses lighter roasts as previously noted, but the grind size depends on you. Medium grounds are a good way to start experimenting based on your preference, but if you want a stronger drink, use finer grounds, and if you want a sweeter, milder beverage, use coarser grounds. Coarser grounds are also ideally used for pour-overs because if you use powder-like grounds, you risk the water pooling over your filter and drain a lot slower. Water flows through better when there’s enough space to seep through and saturate the grounds.
Stirring works for unclogging your filter, while you can cancel the airtight seal inside the Chemex by slightly lifting the filter or slipping a spoon or stick to separate the filter from the edges and release the gases.
Brewing Espresso Blends With Chemex
Finally, it comes to this. Once again, this is going to be an okay experiment, but don’t expect too much on the first try. To help you get a good and desirable cup of java from this unusual duo, I’ll lay out a few tips based on what we’ve discussed about the two.
Choosing Your Grounds
Since we’re talking about espresso blends here, that means we’re dealing with a darker roast of beans, and perhaps a bag that already contains finely ground coffee, but if you grind your beans, then opt for a medium to coarse grind size. So there’s no need to be picky here from the start. There are light roast “espresso” blends out there that you can try, but they’re so rare and unusual that you can hardly get your hands on one.
Remember your ratio has to be 1:16 of coffee to water in grams. This could more easily translate to being 60 g of beans per liter of water.
Choosing Your Filter
Apparently, a paper filter isn’t a strict standard in a Chemex brewer, but rather, you also get to choose a metal cone with extremely small holes, they’re almost invisible! Fortunately, though, this conic mesh is identical to the one in a portafilter, so I highly recommend you use this metal filter to get the best flavors out of your espresso blend.
A paper filter is still a thumbs up, especially if you don’t want much of the bittersweet oils seeping through, and if you’re also too careful about cafestol and kahweol, which were said to raise cholesterol levels. There’s truth to that, but it’s unknown whether these oils cause a spike in LDL (bad) cholesterol, but some studies show that they improve HDL (good) cholesterol which in turn helps reduce LDL and promotes heart health. Yet, if you still don’t want them, just ditch them with a paper filter.
Preparing Your Chemex
If you don’t have a Chemex, you can still use a mug and a paper filter, or you can also buy yourself one because it’s definitely worth the bucks. It’s got a pretty aesthetic shape too.
So first you’d want to put your filter onto the upper chamber of your Chemex, wet it if you have a paper filter, or wash it if you use a metal one. This is so any chemical flavors from either paper or metal could be rid of immediately before you pour in your coffee. This is a crucial step so make sure you do it by pouring hot water over your filter and letting it drain into your Chemex or mug, then just take it away.
Making Your Pour-Over
Next, you’d put in your grounds and make a depression in the center where you can pour your stream of water. Make sure your water is hot at about 205° F. Pour in a bit of water, gently and just enough to saturate all the grounds while they release their gases via bubbling. This is called “blooming” and the step ensures the purity of the coffee flavors and the safe reduction of chemical gases such as carbon dioxide.
After blooming, let the wetted grounds sit for about 30-45 seconds before you pour in more water that would become the true infusion or the real pour-over. Gently swirl your water around the grounds to evenly saturate them, while occasionally stirring them to allow the water to drain faster and to expose more of the grounds’ surface.
You can put in all your hot water after the blooming, or you can pour them in 4, 30-second intervals to get the richest flavors of the coffee. The first pour would have to 3 times the amount of water you poured for the initial bloom, while the succeeding pours would be equally half of the first pour.
However, I don’t recommend this if you’re using espresso grounds because you’re dealing with a blend that releases its flavors quite vigorously with just enough hot water and pressure. Pressure aside, the hot water is enough to fully saturate the grounds within the single continual pour, but the downside is you have to stir more often while pouring so that the water won’t pool over your grounds and would much easily seep through your filter.
Remember, the longer you brew the espresso grounds, the more bitter and caffeinated your coffee will come out. So it may be better to be more energetic in brewing espresso over Chemex as you don’t want to end up with an extremely bitter and kicking drink.
If you get the methods and the fundamentals of espresso right, you can hope for a desirable pour-over coffee, but it not, then it’s all just part of the process.
Bottom Line
As I’ve said, brewing espresso beans with the pour-over method and Chemex is quite an experimental adventure that you may have to try a couple of times before you can get to your preference. However, that only makes coffee-making more fun and enjoyable as we constantly try to find ways to tweak our coffee into what we like best.
So if you’re the adventurous and creative type of coffee aficionado, then please experiment as much as you’d like.
